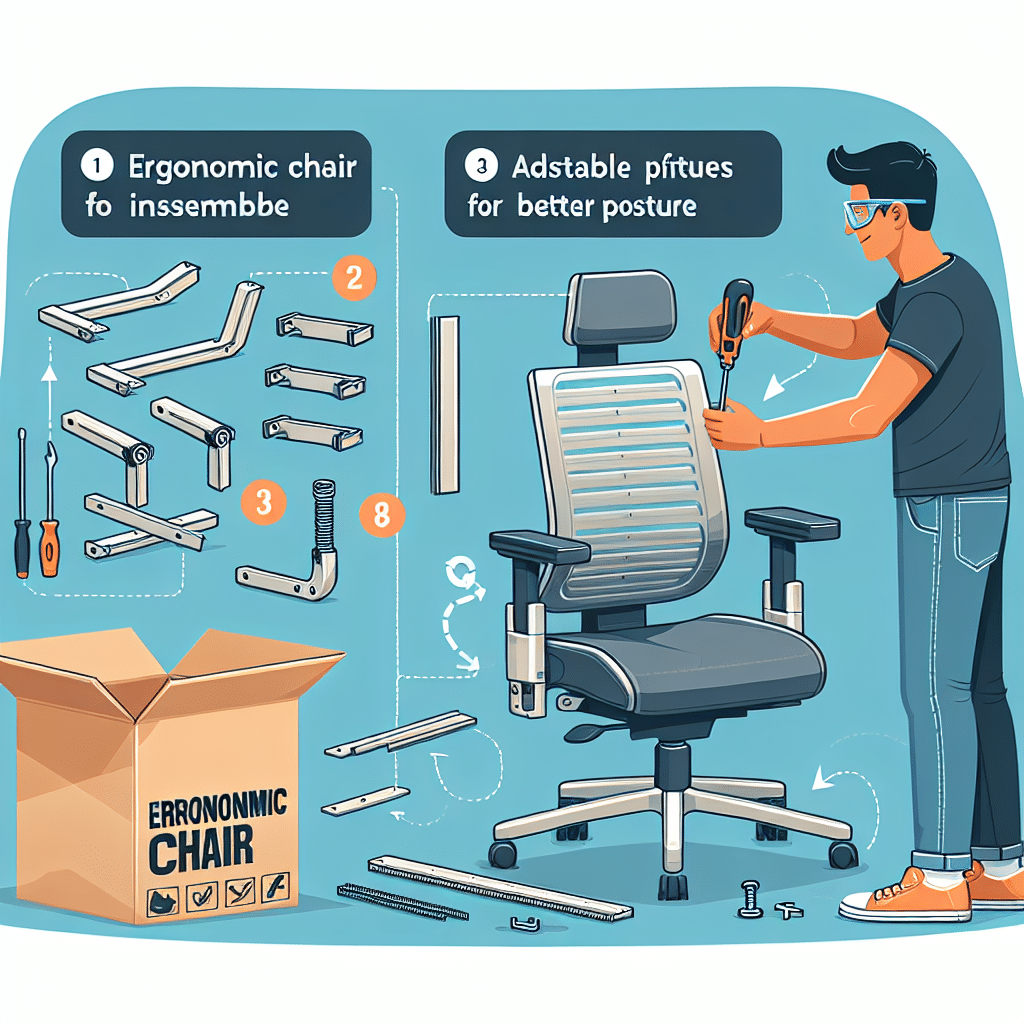
Ergonomic Chair Assembly Tips for Better Posture
1. Understanding Your Ergonomic Chair
An ergonomic chair is designed to support your body’s natural curves and promote good posture. These chairs often come with adjustable features to cater to individual needs, providing the support required for long hours of sitting. Before assembly, familiarize yourself with the components: seat height, armrests, lumbar support, backrest, and wheels. Each element plays a crucial role in maintaining comfort and healthy posture.
2. Gather Your Tools and Space
Before beginning assembly, ensure you have the necessary tools. Most ergonomic chairs come with a manual, which should list required tools. Common tools may include a Phillips screwdriver and an Allen wrench. Choose a spacious area with good lighting to facilitate a smooth assembly process.
3. Read the Manual
Every ergonomic chair is unique, so thoroughly read the assembly manual provided by the manufacturer. It often includes crucial notes on parts orientation, special warnings, and troubleshooting tips. Following these instructions explicitly can prevent issues later on.
4. Begin with the Base Assembly
Usually, the chair base is the first part to assemble. Start by attaching the wheels to the chair’s base. Ensure that they click in securely, as these wheels are critical for mobility. Once the wheels are in place, attach the gas lift cylinder. Most bases will allow for easy insertion of the cylinder, but make sure it’s properly fitted to avoid instability.
5. Assemble the Seat Plate
Next, attach the seat plate to the gas lift cylinder. Carefully position the seat upside down. Align the seat plate with the pre-drilled holes. Use provided screws and ensure they are tightened but not overly so, as this could strip the screws or damage the seat.
6. Set Up the Backrest
Attaching the backrest is crucial for lumbar support. Align the backrest to the seat and secure it with screws as per the manual’s orientation instructions. Be cautious about the height of the backrest; it should mimic the natural curve of your spine. Most ergonomic chairs allow for adjustment later, but early alignment can minimize discomfort.
7. Adjust the Armrests
Armrests need careful positioning for optimal arm support while typing or using a mouse. Assemble the armrests according to the instructions, ensuring they can be adjusted. A good rule of thumb is to set the armrests so that your shoulders are relaxed, and your elbows are at a 90-degree angle.
8. Install Lumbar Support
Some ergonomic chairs come with adjustable lumbar support. Ensure it is attached in line with your lower back. If your chair allows for adjustable lumbar support, test it in several positions until you find the one that provides maximum comfort.
9. Positioning the Chair Correctly
Once the chair is fully assembled, adjust the height of the seat. While seated, your feet should rest flat on the floor with your knees at a 90-degree angle. Use tools combined with your body weight if necessary to lower or raise the seat. A chair too high can strain your legs; too low can cause back pain.
10. Fine-Tune the Recline Feature
Many ergonomic chairs have adaptable recline functions. Find the balance that supports your posture while allowing freedom of movement. A slight recline can relieve pressure on your spine, allowing for slight shifts without sacrificing support. Personal preference plays a role, so adjust until it feels just right.
11. Consider Desk Height and Chair Compatibility
Once your chair is assembled, ensure it suits your desk height. Your elbows should align with the desk surface while maintaining a relaxed posture. An optimal height imposes less strain on your neck and back. If the chair and desk height confound each other, consider adjusting the desk or raising it with risers.
12. Test for Comfort and Adjust Further
Sit in the chair for an extended period for comfort testing. Pay close attention to any discomfort or strain in your back, legs, or hips. Adjust features like seat depth, backrest angle, and armrest height accordingly.
13. Regular Maintenance and Adjustments
Over time, the ergonomic features may need re-adjusting due to wear and tear or changes in your posture preference. Regularly check all screws and mechanisms for firmness and functionality, ensuring that every aspect meets your comfort requirements.
14. Use Additional Support Products
If required, you can complement your ergonomic chair with additional support products. Lumbar cushions, seat pads, and footrests can enhance your sitting experience. Ensure these additions don’t negate the chair’s built-in ergonomic features; instead, they should complement them.
15. Monitor Your Posture
Even the best ergonomic chair cannot replace good posture habits. Use tools like posture reminders or apps that encourage breaks and stretches throughout the day. Shift your position regularly and stand or walk around at least every hour to maintain circulation and reduce fatigue.
16. Importance of Desk Arrangement
Your entire workstation setup is important. Arrange your computer monitor at eye level to prevent neck strain, and keep your keyboard and mouse close enough to keep your arms comfortably by your sides. This holistic approach amplifies the benefits of a well-assembled ergonomic chair.
17. Seek Professional Guidance if Necessary
If you experience ongoing discomfort, consider consulting an ergonomist or physical therapist. They can provide personalized recommendations based on your specific needs and help reassess your workstation setup, ensuring that every component aids in maintaining good posture.
By adhering to these ergonomic chair assembly tips and maintenance guidelines, you can enhance your workspace setup, ensuring that comfort meets functionality. A well-assembled ergonomic chair can be a vital ally in promoting better posture and overall well-being while working.